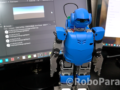
今回は、UnityアプリからRobovie-Zを動かします。
前回までは、

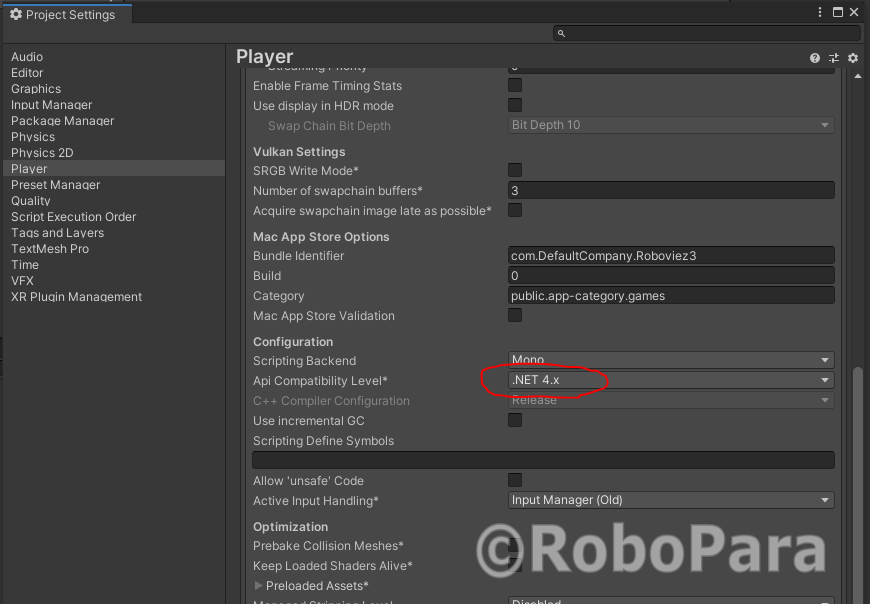
1. Unityプロジェクトを用意
使用するUnityプロジェクトの、Edit→Project Setting→PlayerからApiレベルを”.Net 4.x”に変更。
2. Ros-sharp をセットアップ
前回はRos-sharをAssetストアからインポートしましたが、
今回はリポジトリから最新版をダウンロード、インポートしていきます。
まずは、リポジトリから最新版をダウンロード。
https://github.com/siemens/ros-sharp
ダウンロードしたフォルダを開いて、
ros-sharp-master\Unity3D\Assetsにある、
“RosSharp”というフォルダを丸ごとコピー、
UnityプロジェクトのAssetフォルダ内にペースト。
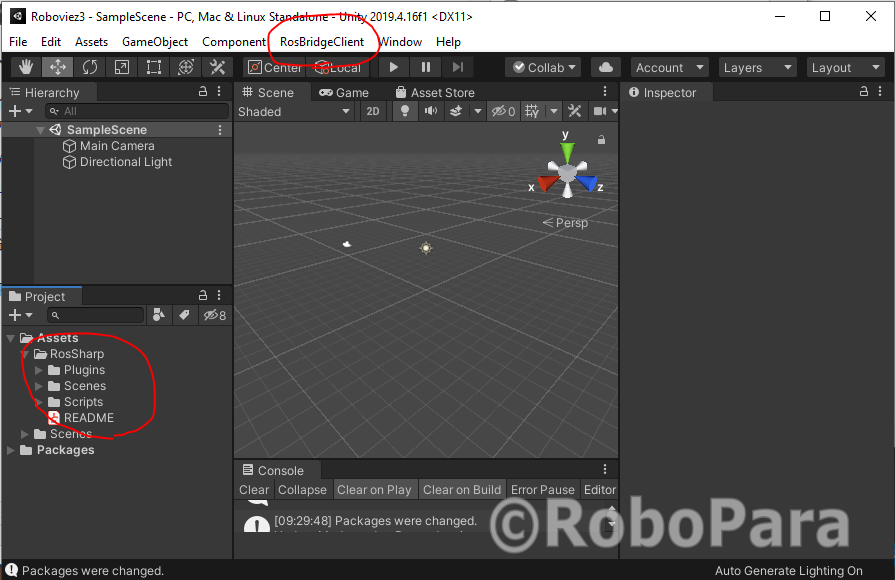
Unityプロジェクトを開いて、Assetフォルダ内に”RosSharp”フォルダが、
そしてツールバーに”RosBridgeClient”があることを確認してください。
3.ROSメッセージモデルを作る
RosSharpの最新版には、ROSの”***.msg”ファイルから、自動でROSメッセージを作成してくれる、とても便利な機能があります。
今回はこれを使うために、アセットストアでなく、リポジトリからRosSharpをセットアップしました。
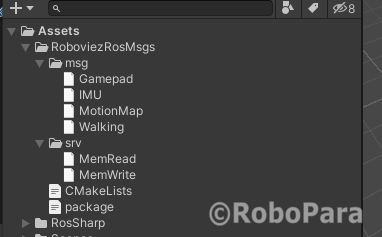
Assetフォルダ内に、新しく”RoboviezRosMsgs”というフォルダを作成し、
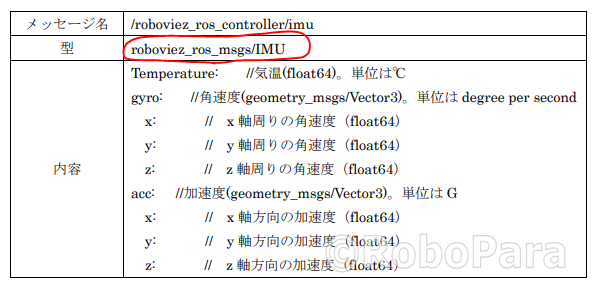
Robovie-ZでROSを動かしてみた – RoboPara
で使ったRobovie-Z ROS SDKに入っている”roboviez_ros_msgs”フォルダの中身をコピー、先ほど作成した”RoboviezRosMsgs”フォルダに貼り付け。
ツールバーから、”RosBridgeClient”→”Auto Generate Message” →”Single Messag”を選んで、
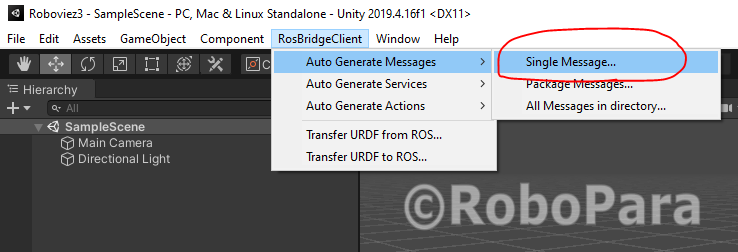
先ほど用意したROSメッセージから”IMU.msg”を選び、パケージネームを”robovie_ros_msgs”と入力。
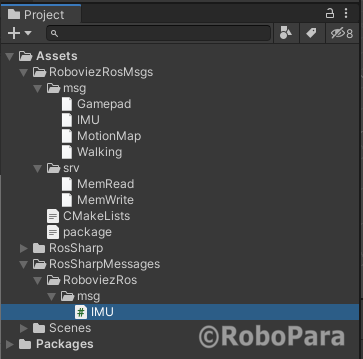
”Generate”ボタンをクリックしたら、ポップアップが出てくるので、かまわず”I like to live…”をクリック。

すると、RosSharpMessagesの中に、”IMU”というスクリプトが生成されていればOK。
ファイルの中身は、
/*
 * This message is auto generated by ROS#. Please DO NOT modify.
 * Note:
 * - Comments from the original code will be written in their own line
 * - Variable sized arrays will be initialized to array of size 0
 * Please report any issues at
 * <https://github.com/siemens/ros-sharp>
 */


using RosSharp.RosBridgeClient.MessageTypes.Geometry;

namespace RosSharp.RosBridgeClient.MessageTypes.RoboviezRos
{
    public class IMU : Message
    {
        public const string RosMessageName = "roboviez_ros_msgs/IMU";

        public double temperature { get; set; }
        public Vector3 gyro { get; set; }
        public Vector3 acc { get; set; }

        public IMU()
        {
            this.temperature = 0.0;
            this.gyro = new Vector3();
            this.acc = new Vector3();
        }

        public IMU(double temperature, Vector3 gyro, Vector3 acc)
        {
            this.temperature = temperature;
            this.gyro = gyro;
            this.acc = acc;
        }
    }
}
18行目の、”RosMessageName”がROSメッセージタイプをになっていればOK。
![]()
Robovie-Zのマニュアルで正しいか確認。
4.Unityアプリを作る
IMUメッセージにSubscribeして、CPUの温度を取得してみましょう。
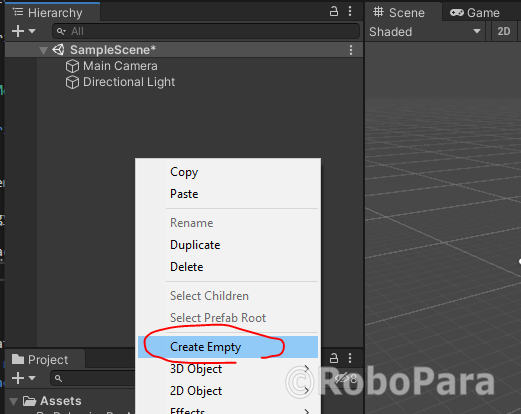
Hierarchyウィンドウで、右クリック、”Create Empty”を選択し、
空っぽのGameObjectを作ります。
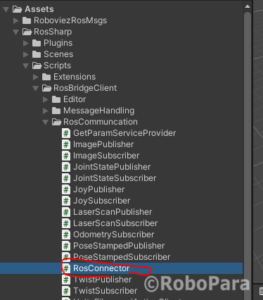
”RosSharp”フォルダから”RosConnector”を”GameObject”にドラッグドロップ。
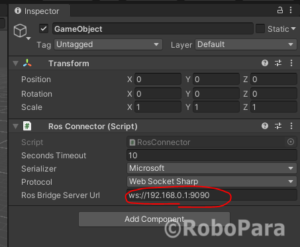
GameObjectのInspectorウィンドウを開いて、IPアドレスをROSマシンのものに書き換えます。
Assetフォルダに新規スクリプトを作成して、先ほど作ったGameObjectにドラッグドロップして追加。

今回はスクリプト名を、”MsgSendReceive”にしました。

先ほど作成した”MsgSendReceive”をエディタで開いてコードを書きます。
using System.Collections;
using System.Collections.Generic;
using RosSharp.RosBridgeClient;
using RosSharp.RosBridgeClient.MessageTypes.RoboviezRos;
using UnityEngine;
using System.Threading;

namespace Roboviez
{
    public class MsgSendReceive : MonoBehaviour
    {
        private RosConnector rosConnector;
        private readonly int SecondsTimeout = 3;

        string subscription_id;

        // Start is called before the first frame update, here the connection with ROS is established and the tipics are defined
        void Start()
        {
            rosConnector = GetComponent<RosConnector>();

            if (!rosConnector.IsConnected.WaitOne(SecondsTimeout * 1000))
                Debug.LogWarning("Failed to subscribe: RosConnector not connected");

            subscription_id = rosConnector.RosSocket.Subscribe<IMU>("/roboviez_ros_controller/imu", SubscriptionHandler, (int)(1 * 3000));
        }

        // Update is called once per frame
        void Update()
        {
        }

        private static void SubscriptionHandler(IMU message)
        {
            Debug.Log(message.temperature);                    //print ROS's message to unity
        }
    }
}
前回、AssetストアからRosSharpをインポートした時には、RosConnectorの接続待ちのためにThread.Sleep()を使用して対応しましたが、今回のリポジトリからダウンロードした最新版では、”rosConnector.IsConnected”が使えます。

5.動かしてみる
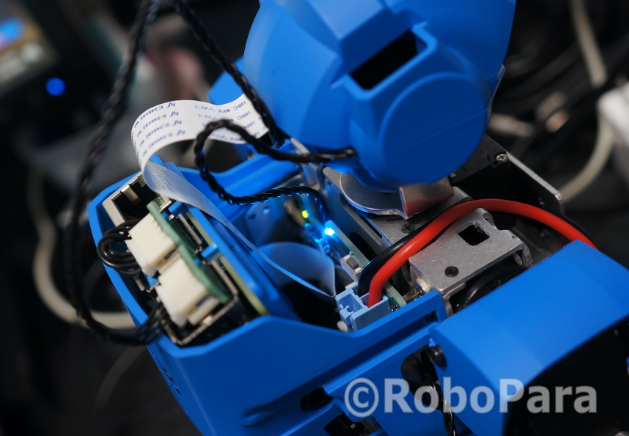
Robovie-Zにバッテリーをつないで、メインCPUの電源オン!
ターミナルを開いて、ROSにログインし、RosBridgeServerを起動。
roslaunch rosbridge_server rosbridge_websocket.launch
別ターミナルから、roboviez_ros_controllerを起動。
rosrun roboviez_ros_samples roboviez_ros_controller.py
Unityアプリを実行すると!?
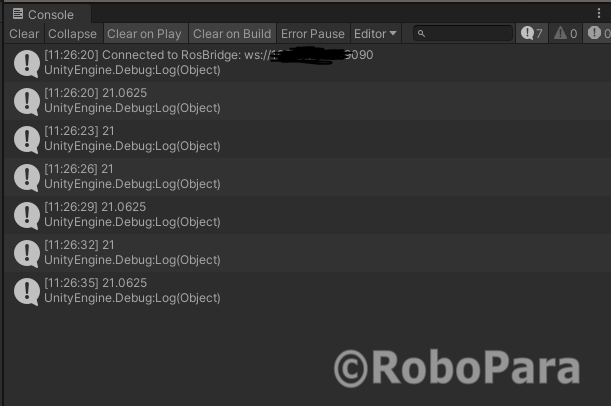
コンソールに、CPUの現在温度が表示されてますね。
成功です!