VSCodeとPlatformIOを使ってMaixduinoでボイスコマンドを音声認識する方法をご紹介します。
SiPeedからMaixduino用のライブラリが出ていて、その中に”Maix_Speech_Recognition”というのがあります。
https://github.com/sipeed/Maixduino/tree/master/libraries/Maix_Speech_Recognition
このライブラリを使えば、簡単に実装できそうです。
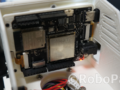
Maixduinoは、とても安価なAI開発ボードで、SDKも充実していて開発もしやすく、
現在製作中ロボットのメイン頭脳として使えないかと、いろいろ検証してます。
前回は、VSCodeとPlatformIOを使ってBlinkを書き込み方を紹介しました。

1.プロジェクトを用意
すでにVSCodeとPlatformIOで試されている方がいたので、そこからソースを拝借します。
https://github.com/andriyadi/Maix-SpeechRecognizer
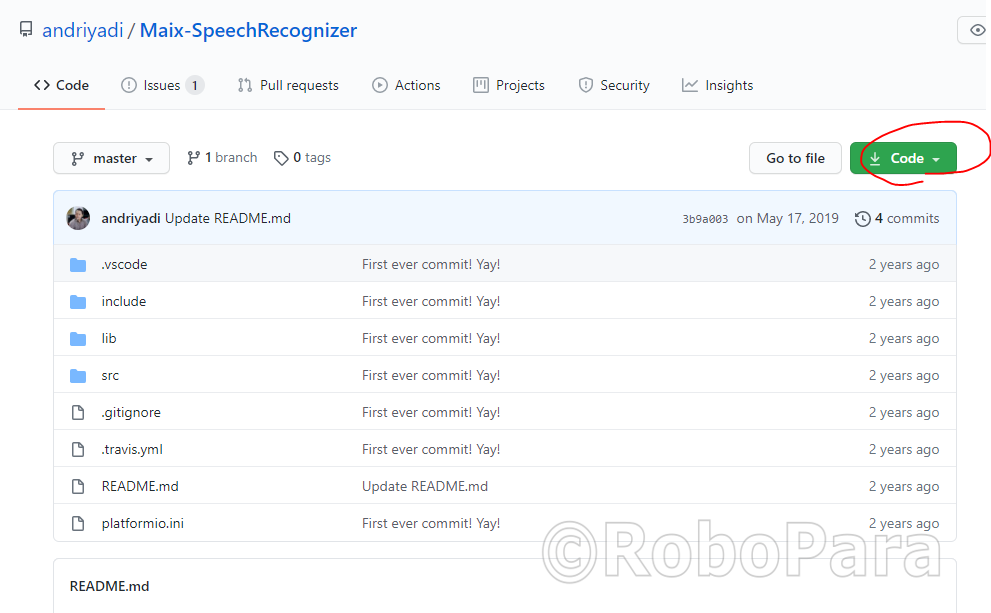
ダウンロードしたZIPファイルを適当な場所に展開して、VSCodeで開きます。
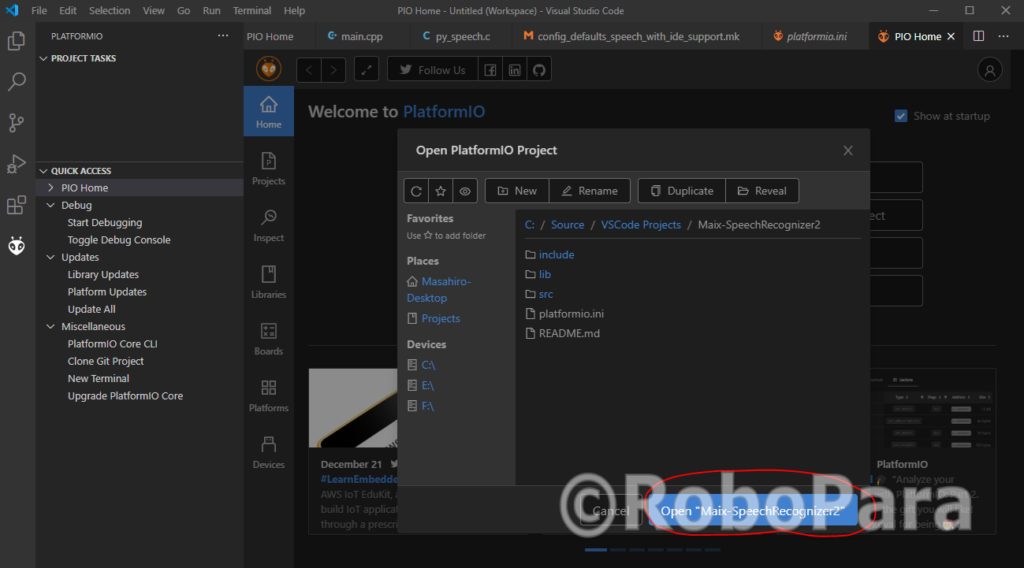
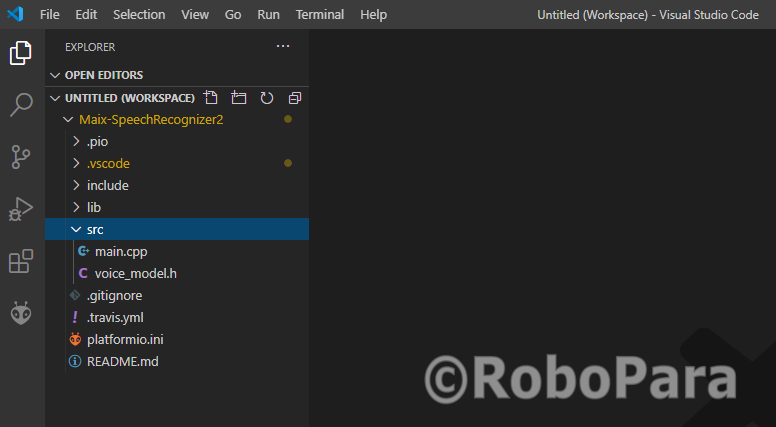
*ワークスペースに別のプロジェクトも一緒に開いていると、気づかずに違うプロジェクトのソースをビルドしていたりと、トラブルのもとになります。慣れていない人は、ワークスペースにはプロジェクト一個だけにしたほうがいいです。
2.Maixduino用に書き換える
ダウンロードしたサンプルはMaixbit用に書かれていて、このままでは動きません。
Maixduino用に修正していきます。
2.1 platformio.iniを修正
まずはPlatformIOが通信するのボード設定が書かれている”platformIO.ini”を修正します。
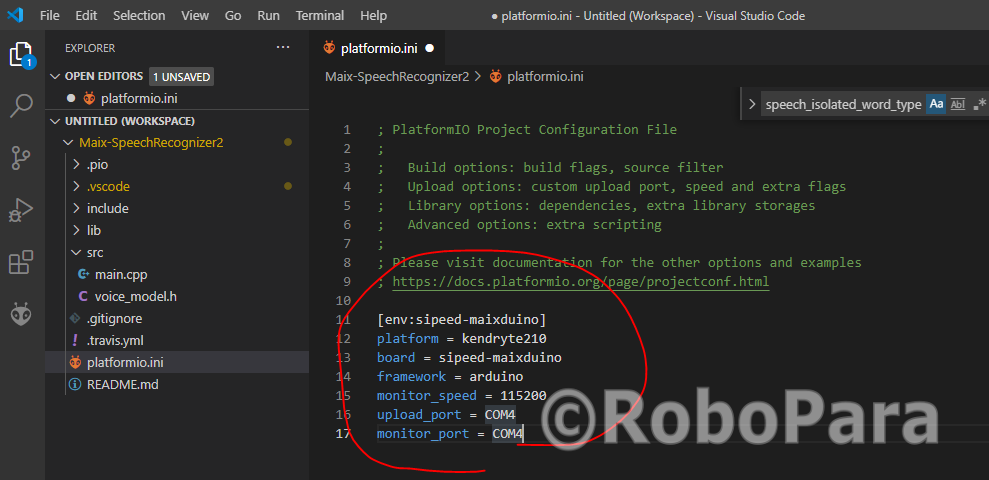
修正したコードがこれ。
; PlatformIO Project Configuration File
;
;   Build options: build flags, source filter
;   Upload options: custom upload port, speed and extra flags
;   Library options: dependencies, extra library storages
;   Advanced options: extra scripting
;
; Please visit documentation for the other options and examples
; https://docs.platformio.org/page/projectconf.html

[env:sipeed-maixduino]
platform = kendryte210
board = sipeed-maixduino
framework = arduino
monitor_speed = 115200
upload_port = COM4
monitor_port = COM4
2.2 main.cppを修正
次に、メインのソースコードとなる、”main.cpp”を開いて修正していきます。
MaixBitに実装されている、カラーLEDが、Maixduinoには実装されていません、このからーLEDを操作しているコード、
”pinMode(LED_RED, OUTPUT);”などをコメントアウトします。
/**
* @file main.cpp
* @brief Demo of speech recognition using Maix board - K210 MCU
* @copyright 2019 - Andri Yadi, DycodeX
*/
#include <Arduino.h>
#include "Maix_Speech_Recognition.h"
#include "voice_model.h"
#include <Sipeed_ST7789.h>
#define RECORD_MODE 0 // Set this 1 to start collecting your Voice Model
#define LABEL_TEXT_SIZE 2 // 2x font size
#define BG_COLOR COLOR_RED
// The awesome recognizer
SpeechRecognizer rec;
// LCD
SPIClass spi_(SPI0); // MUST be SPI0 for Maix series on board LCD
Sipeed_ST7789 lcd(320, 240, spi_, SIPEED_ST7789_DCX_PIN, SIPEED_ST7789_RST_PIN, DMAC_CHANNEL2);
#if RECORD_MODE
void recordModel() {
Serial.println("Start recording...");
if( rec.record(0, 0) == 0) //keyword_num, model_num
{
rec.print_model(0, 0);
}
else
Serial.println("Recording failed! Reset the board.");
}
#endif
void printCenterOnLCD(Sipeed_ST7789 &lcd_, const char *msg, uint8_t textSize = LABEL_TEXT_SIZE)
{
lcd_.setCursor((lcd_.width() - (6 * textSize * strlen(msg))) / 2, (lcd_.height() - (8*textSize)) / 2);
lcd_.print(msg);
}
void setup()
{
rec.begin();
delay(1000);
Serial.begin(115200);
#if RECORD_MODE
recordModel();
while(1);
#endif
if (!lcd.begin(15000000, BG_COLOR)) {
Serial.println("who wants to live forever....");
while(1); //who wants to live forever....
}
lcd.setTextSize(LABEL_TEXT_SIZE);
lcd.setTextColor(COLOR_WHITE);
//pinMode(LED_RED, OUTPUT);
//pinMode(LED_BLUE, OUTPUT);
//digitalWrite(LED_RED, HIGH);
//digitalWrite(LED_BLUE, HIGH);
Serial.println("Initializing model...");
printCenterOnLCD(lcd, "Initializing...");
rec.addVoiceModel(0, 0, hey_friday_0, fram_num_hey_friday_0);
rec.addVoiceModel(0, 1, hey_friday_1, fram_num_hey_friday_1);
rec.addVoiceModel(0, 2, hey_friday_2, fram_num_hey_friday_2);
rec.addVoiceModel(0, 3, hey_friday_3, fram_num_hey_friday_3);
rec.addVoiceModel(1, 0, hey_jarvis_0, fram_num_hey_jarvis_0);
rec.addVoiceModel(1, 1, hey_jarvis_1, fram_num_hey_jarvis_1);
rec.addVoiceModel(1, 2, hey_jarvis_2, fram_num_hey_jarvis_2);
rec.addVoiceModel(1, 3, hey_jarvis_3, fram_num_hey_jarvis_3);
Serial.println("Model init OK!");
lcd.fillScreen(BG_COLOR);
printCenterOnLCD(lcd, "Friday & Jarvis are ready!");
delay(1000);
}
void loop()
{
int res;
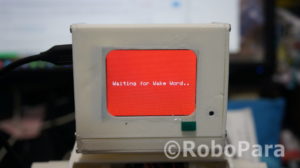
lcd.fillScreen(BG_COLOR);
printCenterOnLCD(lcd, "Waiting for Wake Word..");
//digitalWrite(LED_RED, HIGH);
//digitalWrite(LED_BLUE, HIGH);
res = rec.recognize();
Serial.printf("Result: %d --> ", res);
lcd.fillScreen(BG_COLOR);
if (res > 0){
switch (res)
{
case 1:
//digitalWrite(LED_RED, LOW); //power on red led
//digitalWrite(LED_BLUE, HIGH);
Serial.println("means red LED");
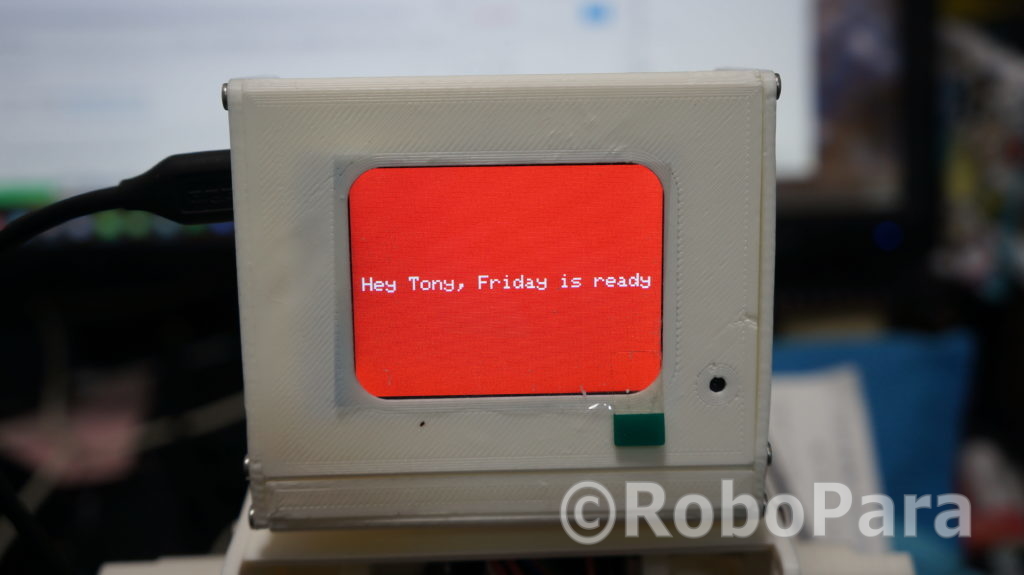
printCenterOnLCD(lcd, "Hey Tony, Friday is ready");
break;
case 2:
//digitalWrite(LED_BLUE, LOW); //power on blue led
//digitalWrite(LED_RED, HIGH);
Serial.println("means blue LED");
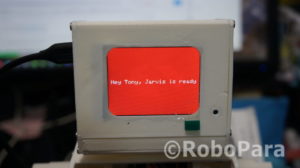
printCenterOnLCD(lcd, "Hey Tony, Jarvis is ready");
break;
case 3:
//digitalWrite(LED_BLUE, LOW);
//digitalWrite(LED_RED, LOW);
Serial.println("-> failed!");
printCenterOnLCD(lcd, "Sorry Tony, I don't know");
default:
break;
}
}else
{
Serial.println("Recognizing failed.");
//digitalWrite(LED_BLUE, LOW);
//digitalWrite(LED_RED, LOW);
Serial.println("-> failed!");
printCenterOnLCD(lcd, "Sorry Tony, I don't know");
}
delay(3000);
}
3.プログラムを実行してみる
3.1 プログラムのビルド
左下のメニューバーから、ビルドボタンを押してソースをビルドします。
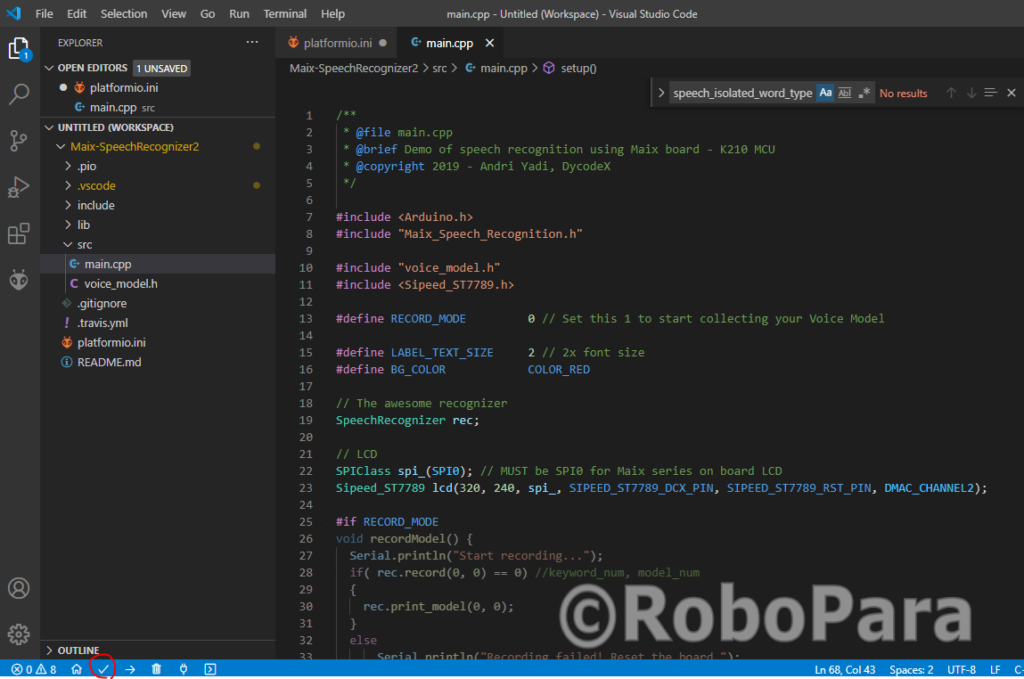
ビルドに成功すると、緑色で”Success”と表示されます。
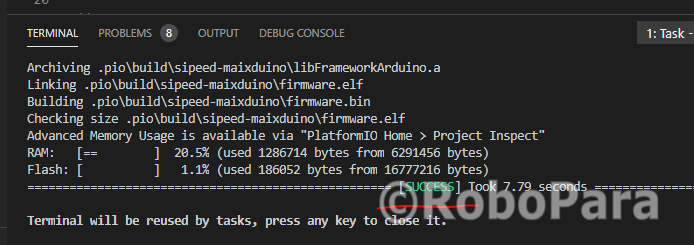
*プロジェクトを開きなおした直後など、プロジェクトのインポートが終わっていない段階でビルドするとエラーになることがあります。ロードが終わってからビルドしなおしましょう。
3.2 プログラムをアップロード
MaixduinoがPCと接続されていることを確認して、ロードボタンを押します。
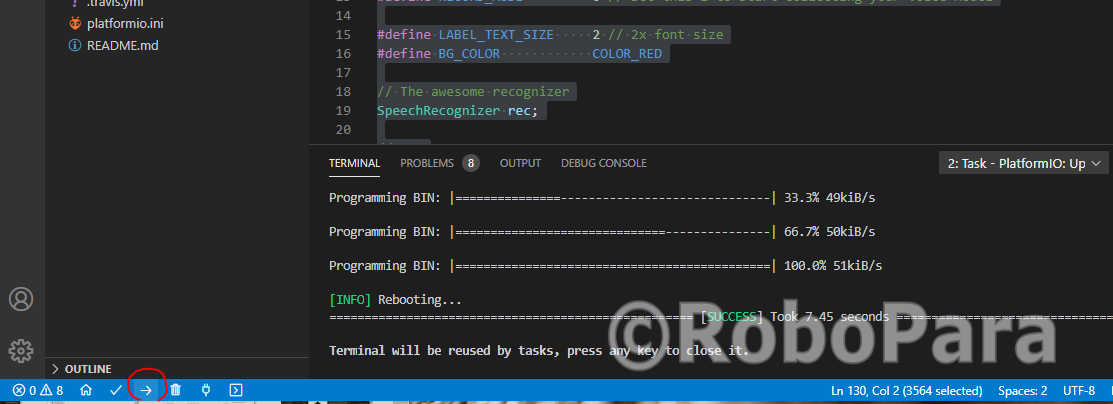
プロジェクトのアップロードがうまくいくと緑色で”Success”と表示されます。
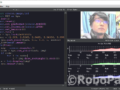
3.3 プログラムからの出力を表示
モニターボタンを押すと、先ほどアップロードしたプログラムが自動で実行されます。
アウトプットを表示して確認してみましょう。
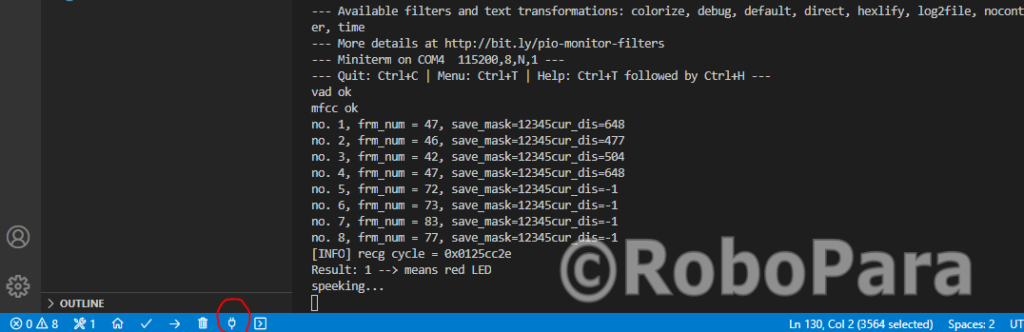
このサンプルでは、
「ヘイ、フライデイ」と「ヘイ、ジャービス」という言葉を認識するように、
トレーニングされています。
話しかけると、ちゃんと反応してますね。

4.単語を追加してみる
認識できる単語を追加してみます。
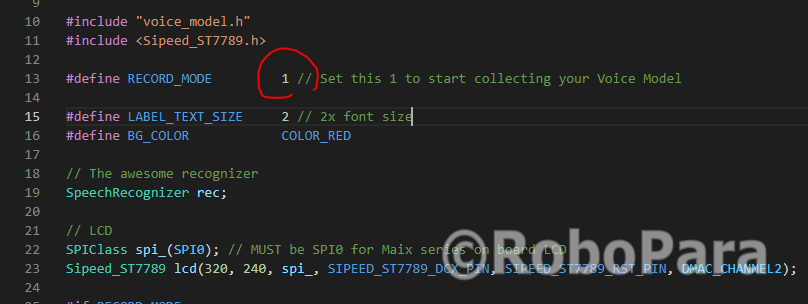
4.1 プログラムをRecordモードに変更
まず、”RECORD_MODE” を”0”から ”1”に変更して、音声モデルを表示するようにします。
4.2 音声データの取得
プログラムを実行して、音声モデルデータを取得します。
”Speeking…”と表示したら、話しかけて音声モデルを作らせます。
製作中のロボットの名前がPaLovieの予定なので、「ヘイ、パラビー」と呼び掛けてみました。
成功すると、”frm_num=28” と出力され、
そのあとに、カンマで区切られた数字がたくさん出てきます。
Start recording...
speeking...
frm_num=28
-33, 44, 38, 52, 47, 48, 48, 51, 47, 49, 49, 50, 57, -348, 3, 27, 11, 20, 46, 41, -73, 69, 13, 65, 12, -382, 3, 16, 16, 34, 26, 0, -88, 101, 12,
62, -13, -404, 41, 32, 34, 50, 43, 29, -42, 96, 22, 78, -40, -393, 59, 7, 58, 54, 39, 25, -41, 101, 16, 68, -75, -381, 54, 1, 85, 29,
52, 22, -26, 111,
4, 76, -90, -362, 49, 25, 64, 13, 40, 13, -1, 119, -3, 55, -96, -377, 32, 19, 31, 0, 18, 24, 8, 101, -15, 51, -77, -369, 52, 40, 32, 17, 54, 0, 48,
105, -1, 40, -70, -372, 32, 58, 1, 12, 40, -7, 37, 89, 0, 30, -17, -363, -17, 22, 20, 9, 73, -40, 17, 69, 20, 28, 18, -300, -22, 23, 12, 17, 103, -41,
16, 44, 29, 98, 18, -214, 29, -10, -22, -16, 97, -35, 8, 56, 13, 66, 9, -296, -54, -25, -29, -4, 121, -71, -2, 38, 29, 20, -11, -328,
-28, 26, 23, 32, 121,
-60, 28, 46, 67, 36, -60, -338, -37, 33, 20, 52, 65, -67, 25, 52, 48, 42, -57, -372, -29, 39, 9, 47, 45, -57, 23, 48, 31, 60, -74, -359, 3, 66, -1, 59,
15, -9, 44, 44, 6, 69, -88, -360, 15, 30, -23, 46, -5, -10, 29, 34, -23, 102, -38, -298, 5, 18, -4, 49, 8, -10, 33, 32, -16, 132, -10, -264, -29, -34, -11,
63, 48, -23, -23, 70, -27, 107, 48, -133, 17, 12, 20, 73, 43, -54, -1, 117, -38, 108, 62, -73, 39, 65, -23, 19, 35, -60, -22, 65, 1, 95, 86, -78, 113, 87,
8, 0, -2, -52, 29, 37, -9, 130, 132, -58, 84, 66, 12, 13, -2, -76, 19, 89, 2, 82, 17, -34, 98, -63, -83, 37, 31, 27, 36, 46, -4, 107,
-78, 92, 73,
-151, 15, -13, 39, 77, 37, 31, -28, 82, -78, 194, 54, -122, 31, -75, 69, 100, 42, 38, -24, 40, 0, 0, 0, 0, 0, 0, 0, 0, 0, 0, 0, 0, 0,
0,
0, 0, 0, 0, 0, 0, 0, 0, 0, 0, 0, 0, 0, 0, 0, 0, 0, 0, 0, 0, 0, 0, 0, 0, 0, 0, 0, 0, 0, 0, 0, 0, 0, 0, 0,
0, 0, 0, 0, 0, 0, 0, 0, 0, 0, 0, 0, 0, 0, 0, 0, 0, 0, 0, 0, 0, 0, 0, 0, 0, 0, 0, 0, 0, 0, 0, 0, 0, 0, 0,
0, 0, 0, 0, 0, 0, 0, 0, 0, 0, 0, 0, 0, 0, 0, 0, 0, 0, 0, 0, 0, 0, 0, 0, 0, 0, 0, 0, 0, 0, 0, 0, 0, 0, 0,
#---ゼロを省略---#
0, 0, 0, 0, 0, 0, 0, 0, 0, 0, 0, 0, 0, 0, 0, 0, 0, 0, 0, 0, 0, 0, 0, 0, 0, 0, 0, 0, 0, 0, 0, 0, 0, 0, 0,
0, 0, 0, 0, 0, 0, 0, 0, 0, 0, 0, 0, 0, 0, 0, 0, 0, 0, 0, 0, 0, 0, 0, 0, 0, 0, 0, 0, 0, 0, 0, 0, 0, 0, 0,
0, 0, 0, 0, 0, 0, 0, 0, 0, 0, 0, 0, 0, 0, 0, 0, 0, 0, 0, 0, 0, 0, 0, 0, 0, 0, 0, 0, 0, 0, 0, 0, 0, 0, 0,
0, 0, 0, 0, 0, 0, 0, 0, 0, 0, 0, 0, 0, 0, 0, 0, 0, 0, 0, 0, 0, 0, 0, 0, 0, 0, 0, 0, 0, 0, 0, 0, 0, 0, 0,
0, 0, 0,
print model ok!
Start recording...
speeking...
Start recording...
speeking...
この”frm_num”と”数字の列数”が音声モデルのデータで、
これを”voice_model.h”に書き込みます。
4.3 音声データを定義
voice_model.hの音声データは、
const uint16_t fram_num_voice_name = [frm_num];
const int16_t voice_name_0[vv_frm_max*mfcc_num] = { [voice data array]};
といった感じに定義します。
実際のファイルはこんな感じに変更しました。
#ifndef __VOICE_MODEL_H
#define __VOICE_MODEL_H

#include <stdint.h>
#include "util/MFCC.h"

#ifdef __cplusplus
extern "C" {
#endif


const uint16_t fram_num_palovie_0 = 28;

const int16_t palovie_0[vv_frm_max*mfcc_num] = {-33, 44, 38, 52, 47, 48, 48, 51, 47, 49, 49, 50, 57, -348, 3, 27, 11, 20, 46, 41, -73, 69, 13, 65, 12, -382, 3, 16, 16, 34, 26, 0, -88, 101, 12,
62, -13, -404, 41, 32, 34, 50, 43, 29, -42, 96, 22, 78, -40, -393, 59, 7, 58, 54, 39, 25, -41, 101, 16, 68, -75, -381, 54, 1, 85, 29,
52, 22, -26, 111,
4, 76, -90, -362, 49, 25, 64, 13, 40, 13, -1, 119, -3, 55, -96, -377, 32, 19, 31, 0, 18, 24, 8, 101, -15, 51, -77, -369, 52, 40, 32, 17, 54, 0, 48,
105, -1, 40, -70, -372, 32, 58, 1, 12, 40, -7, 37, 89, 0, 30, -17, -363, -17, 22, 20, 9, 73, -40, 17, 69, 20, 28, 18, -300, -22, 23, 12, 17, 103, -41,
16, 44, 29, 98, 18, -214, 29, -10, -22, -16, 97, -35, 8, 56, 13, 66, 9, -296, -54, -25, -29, -4, 121, -71, -2, 38, 29, 20, -11, -328,
-28, 26, 23, 32, 121,
-60, 28, 46, 67, 36, -60, -338, -37, 33, 20, 52, 65, -67, 25, 52, 48, 42, -57, -372, -29, 39, 9, 47, 45, -57, 23, 48, 31, 60, -74, -359, 3, 66, -1, 59,
15, -9, 44, 44, 6, 69, -88, -360, 15, 30, -23, 46, -5, -10, 29, 34, -23, 102, -38, -298, 5, 18, -4, 49, 8, -10, 33, 32, -16, 132, -10, -264, -29, -34, -11,
63, 48, -23, -23, 70, -27, 107, 48, -133, 17, 12, 20, 73, 43, -54, -1, 117, -38, 108, 62, -73, 39, 65, -23, 19, 35, -60, -22, 65, 1, 95, 86, -78, 113, 87,
8, 0, -2, -52, 29, 37, -9, 130, 132, -58, 84, 66, 12, 13, -2, -76, 19, 89, 2, 82, 17, -34, 98, -63, -83, 37, 31, 27, 36, 46, -4, 107,
-78, 92, 73,
-151, 15, -13, 39, 77, 37, 31, -28, 82, -78, 194, 54, -122, 31, -75, 69, 100, 42, 38, -24, 40, 0, 0, 0, 0, 0, 0, 0, 0, 0, 0, 0, 0, 0,
0,
0, 0, 0, 0, 0, 0, 0, 0, 0, 0, 0, 0, 0, 0, 0, 0, 0, 0, 0, 0, 0, 0, 0, 0, 0, 0, 0, 0, 0, 0, 0, 0, 0, 0, 0,
0, 0, 0, 0, 0, 0, 0, 0, 0, 0, 0, 0, 0, 0, 0, 0, 0, 0, 0, 0, 0, 0, 0, 0, 0, 0, 0, 0, 0, 0, 0, 0, 0, 0, 0,
#---ゼロを省略---#
0, 0, 0, 0, 0, 0, 0, 0, 0, 0, 0, 0, 0, 0, 0, 0, 0, 0, 0, 0, 0, 0, 0, 0, 0, 0, 0, 0, 0, 0, 0, 0, 0, 0, 0,
0, 0, 0, 0, 0, 0, 0, 0, 0, 0, 0, 0, 0, 0, 0, 0, 0, 0, 0, 0, 0, 0, 0, 0, 0, 0, 0, 0, 0, 0, 0, 0, 0, 0, 0,
0, 0, 0, 0, 0, 0, 0, 0, 0, 0, 0, 0, 0, 0, 0, 0, 0, 0, 0, 0, 0, 0, 0, 0, 0, 0, 0, 0, 0, 0, 0, 0, 0, 0, 0,
0, 0, 0, 0, 0, 0, 0, 0, 0, 0, 0, 0, 0, 0, 0, 0, 0, 0, 0, 0, 0, 0, 0, 0, 0, 0, 0, 0, 0, 0, 0, 0, 0, 0, 0,
0, 0, 0, 0, 0, 0, 0, 0, 0, 0, 0, 0, 0, 0, 0, 0, 0, 0, 0, 0, 0, 0, 0, 0, 0, 0, 0, 0, 0, 0, 0, 0, 0, 0, 0,
0, 0, 0};

const uint16_t fram_num_palovie_1 = 35;

const int16_t palovie_1[vv_frm_max*mfcc_num] = {-49, 50, 40, 50, 45, 50, 47, 50, 49, 50, 47, 48, 150, -216, 11, 65, 0, 51, 42, 14, -53, 62, 45, 60, 30, -301, 45, 53, 11, 28, 4, 29, -59, 41, 8,
59, -49, -321, 57, 37, 20, 2, 8, 33, -74, 77, -8, 95, -41, -340, 55, 72, 14, 26, 9, 32, -58, 103, 7, 89, -33, -347, 43, 82, 15, -16, 14, 14, -86, 138,
-26, 81, -34, -350, 47, 67, 12, 12, 8, 2, -24, 102, -18, 95, -78, -375, 25, 90, -9, -16, -26, 17, 0, 72, -37, 105, -98, -355, 27, 110, 12, -8, -11, 13, 33,
77, -26, 89, -118, -412, 40, 75, 22, -39, -7, 0, 25, 67, -34, 97, -100, -382, 46, 91, 27, -36, -1, 9, 43, 56, -20, 93, -100, -382, 24, 76, 25, -32, -15, 5,
28, 67, -33, 107, -126, -362, -21, 99, 11, -19, -1, -14, 50, 35, -21, 100, -113, -316, -40, 42, 13, -16, 69, -38, 30, -8, 32, 69, -14, -259, -26, 4, 8, -9, 114,
#---以下省略---#
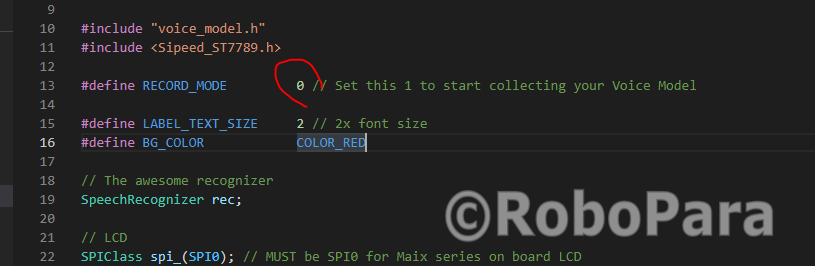
4.4 プログラムを認識モードに変更する
RECORD_MODEに0をセットして、Record モードをOffにします。
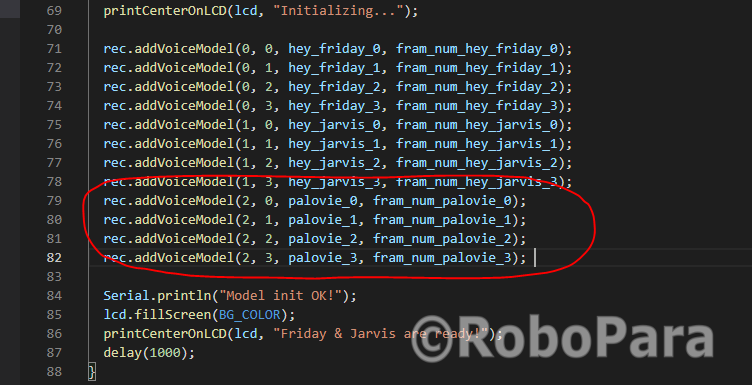
定義ファイルに追加したモデルをロード
認識結果を処理するswitch文を変更。
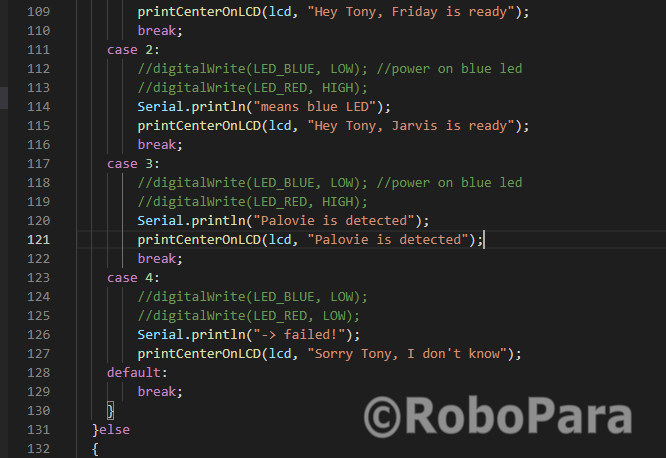
main.cppはこうなりました。
/**
 * @file main.cpp
 * @brief Demo of speech recognition using Maix board - K210 MCU
 * @copyright 2019 - Andri Yadi, DycodeX
 */

#include <Arduino.h>
#include "Maix_Speech_Recognition.h"

#include "voice_model.h"
#include <Sipeed_ST7789.h>

#define RECORD_MODE         0 // Set this 1 to start collecting your Voice Model

#define LABEL_TEXT_SIZE     2 // 2x font size
#define BG_COLOR            COLOR_RED

// The awesome recognizer
SpeechRecognizer rec;

// LCD
SPIClass spi_(SPI0); // MUST be SPI0 for Maix series on board LCD
Sipeed_ST7789 lcd(320, 240, spi_, SIPEED_ST7789_DCX_PIN, SIPEED_ST7789_RST_PIN, DMAC_CHANNEL2);

#if RECORD_MODE
void recordModel() {
  Serial.println("Start recording...");
  if( rec.record(0, 0) == 0) //keyword_num, model_num
  {
    rec.print_model(0, 0);
  }
  else
      Serial.println("Recording failed! Reset the board.");
}
#endif

void printCenterOnLCD(Sipeed_ST7789 &lcd_, const char *msg, uint8_t textSize = LABEL_TEXT_SIZE)
{
    lcd_.setCursor((lcd_.width() - (6 * textSize * strlen(msg))) / 2, (lcd_.height() - (8*textSize)) / 2);
    lcd_.print(msg);
}

void setup()
{
  rec.begin();
  delay(1000);
  Serial.begin(115200);

#if RECORD_MODE
  recordModel();
  while(1);
#endif

  if (!lcd.begin(15000000, BG_COLOR)) {
    Serial.println("who wants to live forever....");
    while(1); //who wants to live forever....
  }

  lcd.setTextSize(LABEL_TEXT_SIZE);
  lcd.setTextColor(COLOR_WHITE);

  //pinMode(LED_RED, OUTPUT);
  //pinMode(LED_BLUE, OUTPUT);

  //digitalWrite(LED_RED, HIGH);
  //digitalWrite(LED_BLUE, HIGH);

  Serial.println("Initializing model...");
  printCenterOnLCD(lcd, "Initializing...");

  rec.addVoiceModel(0, 0, hey_friday_0, fram_num_hey_friday_0);
  rec.addVoiceModel(0, 1, hey_friday_1, fram_num_hey_friday_1);
  rec.addVoiceModel(0, 2, hey_friday_2, fram_num_hey_friday_2);
  rec.addVoiceModel(0, 3, hey_friday_3, fram_num_hey_friday_3);
  rec.addVoiceModel(1, 0, hey_jarvis_0, fram_num_hey_jarvis_0);
  rec.addVoiceModel(1, 1, hey_jarvis_1, fram_num_hey_jarvis_1);
  rec.addVoiceModel(1, 2, hey_jarvis_2, fram_num_hey_jarvis_2);
  rec.addVoiceModel(1, 3, hey_jarvis_3, fram_num_hey_jarvis_3);
  rec.addVoiceModel(2, 0, palovie_0, fram_num_palovie_0);
  rec.addVoiceModel(2, 1, palovie_1, fram_num_palovie_1);
  rec.addVoiceModel(2, 2, palovie_2, fram_num_palovie_2);
  rec.addVoiceModel(2, 3, palovie_3, fram_num_palovie_3);

  Serial.println("Model init OK!");
  lcd.fillScreen(BG_COLOR);
  printCenterOnLCD(lcd, "Friday & Jarvis are ready!");
  delay(1000);
}

void loop()
{
  int res;
  lcd.fillScreen(BG_COLOR);
  printCenterOnLCD(lcd, "Waiting for Wake Word..");
  //digitalWrite(LED_RED, HIGH);
  //digitalWrite(LED_BLUE, HIGH);

  res = rec.recognize();
  Serial.printf("Result: %d --> ", res);
  lcd.fillScreen(BG_COLOR);

  if (res > 0){
    switch (res)
    {
    case 1:
        //digitalWrite(LED_RED, LOW); //power on red led
        //digitalWrite(LED_BLUE, HIGH);
        Serial.println("means red LED");
        printCenterOnLCD(lcd, "Hey Tony, Friday is ready");
        break;
    case 2:
        //digitalWrite(LED_BLUE, LOW); //power on blue led
        //digitalWrite(LED_RED, HIGH);
        Serial.println("means blue LED");
        printCenterOnLCD(lcd, "Hey Tony, Jarvis is ready");
        break;
    case 3:
        //digitalWrite(LED_BLUE, LOW); //power on blue led
        //digitalWrite(LED_RED, HIGH);
        Serial.println("Palovie is detected");
        printCenterOnLCD(lcd, "Palovie is detected");
        break;
    case 4:
        //digitalWrite(LED_BLUE, LOW);
        //digitalWrite(LED_RED, LOW);
        Serial.println("-> failed!");
        printCenterOnLCD(lcd, "Sorry Tony, I don't know");
    default:
        break;
    }
  }else
  {
      Serial.println("Recognizing failed.");
      //digitalWrite(LED_BLUE, LOW);
      //digitalWrite(LED_RED, LOW);
      Serial.println("-> failed!");
      printCenterOnLCD(lcd, "Sorry Tony, I don't know");
  }
  delay(3000);
}
4.5 プログラムを実行
プログラムをビルドして、アップロードすると!?
当然ですが、「ヘイ、パロビー」の認識率が一番高いです。
これは、「パロビー」の音声モデルが、私自身の声から作られたのに対し、
「フライデイ」と「ジャービス」は、お借りしたソースの作者さんの声から作られているからです。
私の発話に対する認識率が下がるのは当然ですね。
音声モデルをすべて私の声で作成した場合に、
認識率がどう変わるのか気になりますね。